Get The Most Affordable Hosting in the World!
Starting at just $1.87/month, Vercaa offers unbeatable pricing for world-class web hosting services.
Fast, reliable, and secure hosting to power your website without breaking the bank. Plus, enjoy a free CDN for faster loading times worldwide!
Get Started Now!CageFS is one of the greatest things ever happened on the web hosting world. It’s the key and heart for CloudLinux security. And today you will learn how to install cagefs on CloudLinux, and enable cagefs from CageFS user interface.
CageFS is a virtualized file system, but it is not only that… CageFS it’s as its name suggest, a cage… where every user is contained in its own “cage”. Like a chroot, as every user of the Linux system has it’s own system files, tools, directories, etc.
CageFS is really useful in shared web hosting enviroments, as well as dedicated servers & cloud servers too.
Benefits of using CageFS
- Users care jailed into a virtual file system.
- They can use only safe system binaries.
- Users can not detect any other users or domains on the system
- Web services such as Apache or MYSQL are not seen by users, they can not read configuration files.
- Users are not able to see other users system processes, they are jailed into their own process on /proc file system.
CageFS Requirements
- Apache running suexec, suPHP, mod_fcgid or mod_fastcgi (mod_php is not supported) or LiteSpeed Web Server.
- Kernel: CL5 with lve0.8.54 or later, CL6 with lve1.2.17.1 or later, CL7.
- 7GB of available disk space
- 8MB per customer in /var directory
- 5GB to 20GB in /usr/share directory
How can I Install CageFS on CloudLinux?
To install CageFS follow this commands:
yum install cagefs
/usr/sbin/cagefsctl --init
This commands will install cagefs file system, and the last command will install the skeleton directory, this uses around 7GB of disk space, so if you don’t have free disk space on /usr/share, you can use the following option to set a new temporary directory:
mkdir /home/cagefs-skeleton
ln -s /home/cagefs-skeleton /usr/share/cagefs-skeleton
Installing CageFS with CloudLinux on cPanel
cPanel servers are the most popular among the shared web hosting world. For cPanel based control panel, you will have to run a special configuration, check this out.
Move to:
WHM >> Server Configuration >> Basic cPanel/WHM Setup >> Basic Config >> Additional home directories.
Then set the value to blank.
Warning: if you don’t do this, cPanel will create the new accounts at incorrect places.
How can I enable CageFS for all my users?
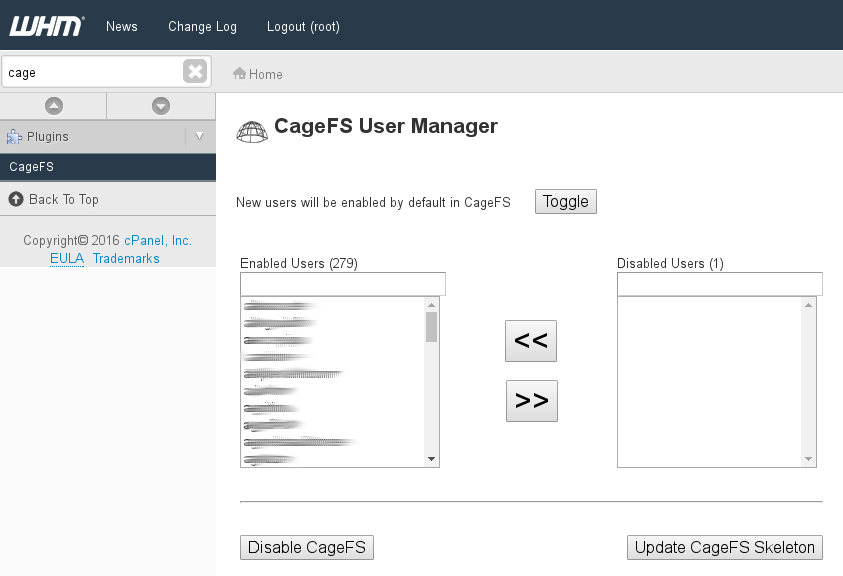
Once ready, a web interface will be ready for you to manage CageFS users from cPanel (or other control panels like Plesk, DirectAdmin, ISPmanager, etc). This user interface will let you enable cagefs or disable cagefs for certain users. You can access this web interface from:
WHM >> Plugins >> CageFS
From that GUI you can start enabling CageFS for all your users. From this web interface you can enable CageFS or disable for the required users

All done. At this time you should know how to install CageFS on CloudLinux and you will also be able to enable CageFS for all the system users from WHM interface.
The End! should you have any inquiries, we encourage you to reach out to the Vercaa Support Center without hesitation.


